Dark Blue/Grey

************************************************************************************************

I’m not sure what my problem is today, but I for the life of me cannot finish the simple task of packing my one tiny little suitcase for my Eastern European adventure. I washed and folded all of my clothes earlier this week. I neatly arranged all of my options on my bed between classes this morning. So why can’t I just pick out what I want and put it in that damn purple bag?! One of my main hang ups seems to be choosing between my dark blue and my light grey jeans. This is probably the dumbest problem anyone has ever had. It seems to be symbolic of my life: easy and comfortable but often made “difficult” by trivial choices that I often overanalyze. My indecisiveness is clearly one of my more attractive qualities.

It’s also probably somewhat the result of my current “limbo” state of being. Not knowing when I’ll be heading home. Not knowing if I’ll be hired for the most amazing summer job of my life. Having absolutely no backup to said wonderful summer job. Having no future projections past said wonderful summer job. Feeling so unbelievably ready to be done with teaching and return to Minnesota/feeling an overwhelming surge of jealousy at the sight of five friends posting joyful facebook statuses of their acceptance as teaching assistants for the fall. Wanting to go out and enjoy the last Friday before vacation/wanting to stay in to shake off the lasting dregs of yet another cold. Flurgh. Boy needs to get it together.

On a much happier note… I’M GOING TO POLAND TOMORROW AND I COULD NOT BE MORE JAZZED! My friend Victoria and I have planned a stellar tour of Poland, the Czech Republic, and Hungary, mostly with the intent to make headlines by running all of Eastern Europe into a terrible food crisis by eating anything and everything they have to offer. Watch out Slavs – one dynamic digestion duo is coming for your provisions. As Tina Fey so aptly described Slavic food in her book Bossypants (which I highly recommend you read/listen to on audiobook) “… it’s buttery and delicious. It’s just potatoes, rice, meat, and cabbage in an endless series of combinations.” I fully intend to eat my entire body weight in pierogi. Every night. This may actually be possible since Eastern European currency is worth approximately nothing compared to the Euro. It’s going to be fabulously gluttonous, and I can’t wait!

Because of this wonderful 13 day voyage, I probably won’t be posting anything new until I get back. At that point, be ready for me to lay it on thick. Like Polish butter thick. Or thin if all we end up doing is eating and I have nothing else to describe but the appetizing confections I have consumed. Since I’ll be missing two photo sundays, I’m going to get a head start and show you what I’ve been up to over the past five days (I had to retype that 4 times to keep myself from saying “fast pive days”). It hasn’t been a whole lot since I caught myself  a lovely cold on Sunday and have been pretty bummed about the fact that Alex had to head home to Germany on Wednesday… That being said, here are some pix for your viewing displeasure:

Day 19: sick and sleepy

Day 20: sickness continued. my ever so lovely tonsils.

Day 21: Alex left today. The house feels rather empty without her here. Bisous ma chérie!

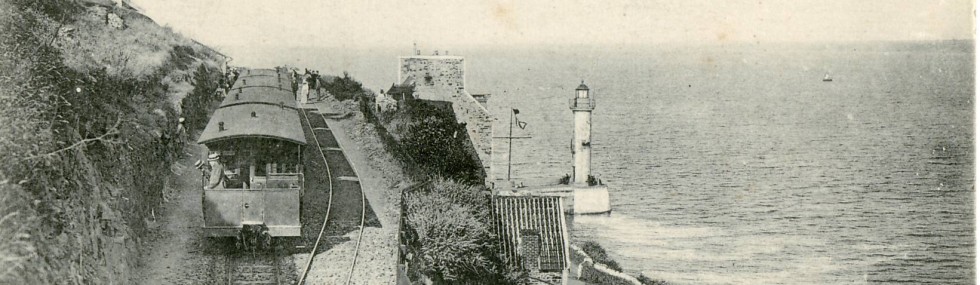
Day 22: Day trip to Binic. Taken with the assistance of Kate P!

Day 23: sunny afternoon spent reading "Le Neveu Du Magicien" by C.S. Lewis in my favorite reading tree

Must go to sleep now! Travel day tomorrow! Bisous xoxoxoxoxoxo

P.S. For those of your concerned, I decided on the dark blue over the grey.

A Foray in Fried Food: Adventures in Falafel

Growing up in the land of hot dishes and deep fried delicacies gave me profound appreciation for rich, heavy foods. Many of my favorite dishes involve ample amounts of cheese, butter, potatoes and carbs. As a  born and raised Minnesotan, it seemed inevitable that I would one day try my hand at frying food. Today was that day. While I love me a good plate of onion rings or a nice boat of cheese curds, I opted for a something not expected from the State Fair. Instead of making something from the Midwest, I made something from the Middle East: Falafel! Tasty, light, and 100% VEGAN!

I’ve been craving these delicious chickpea fritters for quite sometime, and I’m pleased as punch that I finally took the plunge and whipped some up with my friend Victoria! Having never fried anything before, cooking was not without a few minor bumps and set backs, but as Julia Child once said, “No matter what happens in the kitchen, never apologize!” There were a couple “testers” that flopped, but the end result was fantastic, well worth it and much easier than originally anticipated. If you’ve never plopped anything in a rolling pot of oil, you are missing out. There is something strangely satisfying about watching something bubble and boil until its outsides are crispy and brown. As it turns out, this is also not as bad for your health as you may have thought! A recent article from BBC says that experts found no heightened risk of heart disease or premature death linked to food that had been fried using olive or sunflower oil! Awesome.

Per usual, I created my own recipe using a combination of different suggestions found via google. My two main sources were about.com and foodnetwork, helped along with my personal experiences of successful falafel tastings. Victoria and were quite pleased with the results. We served our falafel with a simple couscous salad (recipe below), but they can also be enjoyed in a warm pita with cucumbers, tomatoes, and shredded lettuce. Without further ado…

Falafel and Couscous Salad

INGREDIENTS:

100% VEGAN!

2 (15 oz.) cans chickpeas (garbanzo beans), drained and rinsed

1 tsp. baking powder

1 medium sized onion, coarsely chopped

5 garlic cloves, smashed and chopped

1 T. tahini

1 T. ground cumin

2 tsp. ground coriander

1/2 tsp. ground cayenne or red pepper flakes

1/4 tsp. ground ginger

1/2 tsp. salt

1/4 tsp. black pepper

1 handful of fresh parsley, finely chopped

5-7 T. all-purpose flour

Olive or sunflower oil for frying

WHAT TO DO:

1) GRIND UP ON IT: Using either a food processor or a medium sized bowl and an immersion blender, grind up the chickpeas. Don’t go crazy – a few lumps should remain, but make sure there are no whole chickpeas left.

2) MIX, AND KEEP ON GRINDIN: Add in the baking powder, onion, garlic, tahini, spices, and herbs, then keep on keepin on. Blend until a thick paste is formed, scrapping down the sides of the bowl as needed. A few chunks here and there are kinda nice in my opinion, but make sure the spices and flour are evenly incorporated.

3) COOL DOWN AND HEAT UP: Put the mixture in the fridge for at least fifteen minutes. The cooler it is, the better it will stick together while frying. At the same time, start heating up about 3 inches of oil in a small pot or deep frying pan. It should be around 375° F (190° C), but if you don’t have a cooking thermometer, “medium-high” should suffice.

4) FRY THAT SHIT: Form the batter into ping-pong size balls, and carefully plop them into the hot oil making sure they don’t stick to the bottom of the pan. Fry, turning as needed until they’re crispy and golden brown on all sides. Remove with a slotted spoon to drain off excess oil, and let dry slightly on a plate lined with paper towels.

5) IMPORTANT FRYING TIPS:

  • Do a test run! Before sacrificing precious batter, try frying just one at first. This will give you a chance to test the temperature of the oil and the consistency of the batter.
  • If a strange bubble forms at the top of the falafel, the oil may not be hot enough, or the dough not cool enough.
  • If the ball falls apart while frying, add a little more flour to the batter to thicken it up.
  • Don’t crowd the balls! They need some space to get nice and brown on all sides, plus it will be easier to scoop them out with out damage if you have some space to move around!
  • Make sure the oil is deep enough. If the falafel isn’t fully submerged, it won’t brown properly on all sides!

6) EAT AND BE HAPPY: As I mentioned above, falafel can be served a number of different ways. No matter how you eat it, though, falafel is sure to put a smile on your face, and happiness in your stomach. Unless you messed up and give yourself food poisoning.

LEMON THYME COUSCOUS SALAD À LA VICTORIA MEADER

INGREDIENTS:

ALSO 100% VEGAN!

1 cup couscous

1 cup water

1 T. olive oil

1/2 T. lemon juice

1/2 tsp. dried thyme

1/4 tsp. garlic salt

Salt

Pepper

1/2 medium onion, diced

3 medium size tomatoes, diced

1/2 cucumber, diced

WHAT TO DO:

1) COOK THE COUSCOUS: Instructions on your preferred brand of couscous may vary, but generally speaking here’s what you do. Bring a cup of water and a dash of salt to a boil over high heat. Once the water is nice and bubbly, remove from the burner, add the couscous, stir, and cover. It should be ready in 4 or 5 minutes.

2) GIVE IT SOME FLAVA: After fluffing the couscous with a fork, add the oil, lemon juice, thyme, and garlic and give it a nice stir. Salt and pepper to taste.

3) MIX IN SOME VEGGIES: Enough said.

4) EAT HOT OR COLD: Simple as that! It serves wonderfully as a bed for the falafel, but is definitely just as good on it’s own.

Happy Middle Eastern dining! XOXO

Chocolate Zucchini Blog

As I’ve mentioned in some of my previous posts, a considerable amount of my time in France is spent in the kitchen. I am a huge fan of cooking and baking, and more importantly, a huge fan of eating. Not to be arrogant, but I must say that my culinary efforts have resulted in some pretty effing delicious things. And since nothing particularly interesting has happened in the past couple of weeks, I thought it would be fun to start adding some of my favorite recipes to my blog to spice things up – pun fully intended. I’ll add things as I make them, allowing you all to drool over the pictures, thus inspiring you to get into the kitchen yourselves!

We’ll start with something that’s as simple as it is delicious: Chocolate Zucchini Bread! I absolutely love “quick” breads, and this one has been at the top of my list for quite some time because it combines two of my favorite things: chocolate and zucchini. It’s best to make in the later months of summer when the vegetable is in season, but should be made year round because it is always tasty. Always. Plus, you’ll feel a lot better eating chocolate knowing that low-calorie, vitamin-rich zucchini is involved! The recipe I used is a modified version of one found on joyofbaking.com. Mine basically uses a little more flour, slightly different spices, apple sauce instead of vegetable oil, and of course more chocolate. I’ve made the original in the past with great success, but prefer my tweaked version for obvious reasons (mostly the extra chocolate). Voilà un photo, followed by the recipe:

Chocolate Zucchini Bread

Ingredients:

1 and 1/2 cups shredded raw zucchini (about 1 large zucchini)

1 and 1/4 cups all-purpose flour

1/2 cup unsweetened cocoa powder, sifted

1 tsp. baking soda

1/4 tsp. baking powder

1/4 tsp. salt

1 tsp. ground cinnamon

1/4 tsp. ground ginger

1/4 tsp. ground cloves

1/2 cup unsweetened apple sauce

1/2 cup white sugar

1/2 light brown sugar, packed

2 eggs

1 tsp. vanilla extract

1 cup semi-sweet chocolate chips

What to do:

1) PREPARE: Before you start mixing away, get yourself ready with a few important steps:

  • First, grease a 9 x 5 x 3 inch bread pan with a considerable amount of butter (or PAM if you’re lazy), because there is nothing worse than a stuck loaf of bread. Set aside.
  • Second, grate the zucchini so it’s ready to mix in later.
  • Third, Preheat the oven to 350°F (about 175°C)

2) MIX DRY INGREDIENTS: In a medium sized bowl, whisk together the flour, cocoa powder, baking soda, baking powder, salt, cinnamon, ginger, and cloves until well blended and all the lumpies are gone.

3) BLEND “WET” INGREDIENTS: In a large bowl, beat together the apple sauce, sugars, eggs, and vanilla extract with an electric mixer until well-blended. Don’t go crazy – about two minutes should do. Fold in the shredded zucchini.

4) COMBO TIME: Add the flour/cocoa/spice mixture to the big bowl, and beat with the mixer, just until blended and everything becomes and irresistible chocolately color. Lick off the beaters (unless you’re a germaphobe and fear getting salmonella poisoning) because they will taste wonderful. Fold in the chocolate chips using a rubber scrapper and be amazed by what you have just created!

5) BAKE THAT SHIT: Scrape the batter into the greased up pan and bake until the bread has risen and you can stick a toothpick into the center without it coming out all poopy. This can take anywhere from 55 minutes to an hour and a half, so start with 55 minutes and gauge things from there.

6) WAIT: This is the hardest part. Distract yourself with books, magazines, T.V., musical instruments… whatever you have on hand really.

7) BE COOL: You will be tempted to eat the bread the second it comes out of the oven. Don’t do this unless you want molten chocolate to burn your fingers and scald your throat. Let it cool in the pan on a wire rack for about 10 minutes. Carefully remove the loaf from the pan. Joy of baking suggests waiting until the bread has completely cooled outside of the pan before eating, but I disagree. After 10 minutes, it is fair game and you should have at it.

8) ENJOY: Don’t be shocked if the entire loaf is gone within the same day of making it. It can be eaten for breakfast, lunch and dinner, and you probably will want to eat it for all three.

Pair it with a glass of milk!

Happy Baking! Bisous bisous!